Start of the Game/en: Porovnání verzí
(založena nová stránka s textem „Gaian guides you through the trading system for Rusty Coins. You will receive a small amount from him, with which you can buy bandages, cure potions and a short sword from the relevant NPCs. If you bring these items to him, he will reward you with a large amount of Rusty Coins. '''We recommend not to skip this step, with these coins you can easily buy any equipment you lose!'''“) |
m (FuzzyBot přesunul stránku Začátek Hry/en na Start of the Game/en bez založení přesměrování: Part of translatable page "Začátek Hry") |
||
| (Není zobrazeno 19 mezilehlých verzí od 4 dalších uživatelů.) | |||
| Řádek 9: | Řádek 9: | ||
== Race Selection == | == Race Selection == | ||
After confirming your selection, your character will materialize on Endor. However, it begins as a soul that has yet to choose its earthly form. There are | After confirming your selection, your character will materialize on Endor. However, it begins as a soul that has yet to choose its earthly form. There are {{ll|Rasy|of five races}} to choose from. The chosen race affects the character's {{ll|Staty|stats}} as well as its appearance. It is advisable to decide in advance what {{ll|Povolání|class}} you want to pursue, and choose your race accordingly. | ||
[[Soubor:Startroom.png|startroom]] | [[Soubor:Startroom.png|startroom]] | ||
| Řádek 27: | Řádek 27: | ||
{{Map | {{Map | ||
| | |X=2909 | ||
| | |Y=2145 | ||
|text=Quark | |text=Quark The Guide | ||
}} | }} | ||
| Řádek 46: | Řádek 46: | ||
{{Map | {{Map | ||
| | |X=2902 | ||
| | |Y=2119 | ||
|text=Kenen | |text=Kenen The Guide | ||
}} | }} | ||
| Řádek 62: | Řádek 62: | ||
{{Map | {{Map | ||
| | |X=2980 | ||
| | |Y=2130 | ||
|text=William | |text=William The Guide | ||
}} | }} | ||
| Řádek 75: | Řádek 75: | ||
{{Map | {{Map | ||
| | |X=2995 | ||
| | |Y=2083 | ||
|text=Jake | |text=Jake The Guide | ||
}} | }} | ||
Jake walks you through death and reanimation on Endor. If your character dies, all items (with a few exceptions such as keys or runebooks) will remain in the body, and the player must go to the Healer to revive the ghost. You can find the closest one with <code>.findhealer</code> command. When you come to him, so that he can revive you, he must see you - you must have "War mode" on. It's usually enough, if it doesn't work the first time, try telling him something. Healers are important for other reasons as well, for example if your character catches a plague or poison that he can't cure himself, just get close to any healer and he will rid you of the disease. | Jake walks you through death and reanimation on Endor. If your character dies, all items (with a few exceptions such as keys or runebooks) will remain in the body, and the player must go to the Healer to revive the ghost. You can find the closest one with <code>.findhealer</code> command. When you come to him, so that he can revive you, he must see you - you must have "War mode" on. It's usually enough, if it doesn't work the first time, try telling him something. Healers are important for other reasons as well, for example if your character catches a plague or poison that he can't cure himself, just get close to any healer and he will rid you of the disease. | ||
Another important piece of information she will advise you on is how to reach other levels. Levels on Endor do not jump automatically, but after reaching a sufficient amount of experience (exp) you have to buy a new level from your classmaster. Masters of each profession are discussed in the respective wiki articles. To advance to the next level, if you have enough money in your main backpack, tell the master the command <code>level</code> . | Another important piece of information she will advise you on is how to reach other levels. Levels on Endor do not jump automatically, but after reaching a sufficient amount of experience (exp) you {{ll|Attr:Experience|have to buy}} a new level from your classmaster. Masters of each profession are discussed in the respective wiki articles. To advance to the next level, if you have enough money in your main backpack, tell the master the command <code>level</code> . | ||
So Jake sends you to the master of the wanderer profession, which you are after character creation. It is located in the beginner's camp in Daugas, near Quark. | So Jake sends you to the master of the wanderer profession, which you are after character creation. It is located in the beginner's camp in Daugas, near Quark. | ||
| Řádek 91: | Řádek 91: | ||
{{Map | {{Map | ||
| | |X=2926 | ||
| | |Y=2136 | ||
|text=Cameleo, | |text=Cameleo, Classmaster | ||
}} | }} | ||
Write the <code>level</code> command to him to advance to the next level. The first one is free :-) After that, return to William at the Daugas Bank. After completing this part of the tutorial, your next task is to reach level 3. Run around the city killing animals, doing npc quests, and don't forget to return to Kenen at level 3 (if you forget, you'll have a reminder in the <code>.questlog</code> menu. | Write the <code>level</code> command to him to advance to the next level. The first one is free :-) After that, return to William at the Daugas Bank. After completing this part of the tutorial, your next task is to reach level 3. Run around the city killing animals, doing npc quests, and don't forget to return to Kenen at level 3 (if you forget, you'll have a reminder in the <code>.questlog</code> menu. | ||
Kenen will then send you to Glimp to learn more about professions. | Kenen will then send you to Glimp to learn more about professions. To find Your classmaster talk to Clarenc. He will explain how travling on Endor works, Lars, Silver and Lysander. He will also give You recall runes and mark of wand and wand of recall. | ||
=== Glimp === | === Glimp === | ||
| Řádek 105: | Řádek 105: | ||
{{Map | {{Map | ||
| | |X=2936 | ||
| | |Y=2137 | ||
|text=Glimp | |text=Glimp The Class Tutor | ||
}} | }} | ||
| Řádek 123: | Řádek 123: | ||
{{Map | {{Map | ||
| | |X=2934 | ||
| | |Y=2119 | ||
|text=Gaian | |text=Gaian The Advanced Tutor | ||
}} | }} | ||
Gaian guides you through the trading system for Rusty Coins. You will receive a small amount from him, with which you can buy bandages, cure potions and a short sword from the relevant NPCs. If you bring these items to him, he will reward you with a large amount of Rusty Coins. '''We recommend not to skip this step, with these coins you can easily buy any equipment you lose!''' | Gaian guides you through the trading system for Rusty Coins. You will receive a small amount from him, with which you can buy bandages, cure potions and a short sword from the relevant NPCs. If you bring these items to him, he will reward you with a large amount of Rusty Coins. '''We recommend not to skip this step, with these coins you can easily buy any equipment you lose!''' | ||
'''This completes the tutorial and you can go on an adventure!''' | |||
''' | |||
< | <youtube>https://www.youtube.com/watch?v=ATSYSLJ4QtM</youtube> | ||
</ | |||
< | <span id="Další_užitečné_rady"></span> | ||
* | == More useful hints == | ||
* | |||
* | * Vendors respond to the words <code>buy</code> and <code>sell</code> , the banker will open your chest at <code>bank</code> command - ask him with the word <code>help</code> for more options. Quest vendors usually respond to a greeting ( <code>hi</code> ). | ||
* | * If you need to earn money, collect everything salable and useful from monsters. You can sell reagents to other players if you don't need them. Feathers, hides or meat (after gutting - <code>.rip</code> ) can be obtained from some monsters, which can also be cashed. On the contrary, weapons and armor that have the epithet (shabby) will not be of much benefit to you. Weapons are blunt, armor provides minimal protection and destroy after a few hits. | ||
* | * Watch out for any highlighted system messages when equipping a weapon or armor. Mostly this means you'll have trouble using these items. | ||
* | * Poison can be cured either by healing with Bandages with Healing or Veterinary skill (for druids in morph only) above 50%, or more often with a bottle of cure. A weaker cure potion only cures a weaker poison. Greater cure can completely cure all poisons except natural poison, which can be obtained from poisoned walls. Drinking the cure protects against further poisoning for a while - the stronger the drink, the longer the protection. | ||
* | * You can get out of paralysis with the help of hypnotic ornament (made by craft using engineering). There are several types. The more intelligence the character has, the stronger the ornament is needed. The ornament can be applied using the <code>.hypnotic.</code> | ||
* | * If you go somewhere in a group, use the party system (double click on the right coiled scroll on the character's paperdoll). Everyone in the party will then gain experience. | ||
* | * A mounted animal can only be ridden if it has a briddle on. This is bought from the vendor and is fitted to the animal by a player who has knowledge of Animal Taming. | ||
</ | * You can stable the animal for a fee. Just tell the vendor (stable master) <code>stable</code> , pay and you will receive a confirmation (ticket) that the animal is stabled with him. If the stabled animal has a briddle, the ticket is white, otherwise it is beige. You can collect the animal back by dragging the ticket to any stable master. Don't forget to feed your animals regularly or they will leave you! | ||
* If you find a small yellowish pouch inside the monster's body with the description “a treasure of [name]”, do not try to open it. It is a small treasure, which usually contains some magical item. These treasures are often equipped with some sort of trap that can even kill an unwary hero. A {{ll|Class:Rogue|Member of the Thieves Guild}} can safely open the treasure. | |||
* By killing another player other than in self-defense or without the criminal flag, you get one kill recorded. You become a murderer (= PK, player killer, not recommended for beginners) after reaching 3 kills. | |||
* Do not attack other players who do not have criminal flag unless necessary. You will become the aggressor and the attacked can kill you or call the city guards on you. | |||
* Be careful of your belongings, they can be easily lost. Do not take unnecessary valuables with you on expeditions and hide them in the bank. There is a bank in every city, open your bank chest by using the word bank. Do not be away from keyboard in town while wearing expensive gear; if your character is attacked, no one can defend it but you. | |||
* In your little house, you might encounter a thief who sneaked in through an open door. You can reveal them using the command <code>.housing reveal</code> and possibly kick them out with <code>.housing eject</code>. You can also use the eject command to throw yourself out of the house, ensuring you don’t leave the door unnecessarily open when you leave. If you give someone a key to your house and later decide you don’t want them to have access anymore, you can change the key on the house control panel. It’s also a good idea to change the key after purchasing the house itself. | |||
Aktuální verze z 2. 6. 2025, 09:05
Character Creation
On the first screen after logging into the game, you choose the name, gender and appearance of the character. Only the hairstyle and the color of the waltzes/beards can be changed in the game, the others cannot, so choose carefully. Rules for character names: - Maximum length of 16 characters, only letters and spaces (but no spaces after the name!) - The character must not have a title in the name (e.g. Lord, Sir, etc.) - The character name must follow the principles of polite speech, must not refer to real persons and must not be offensive in any way.
Race Selection
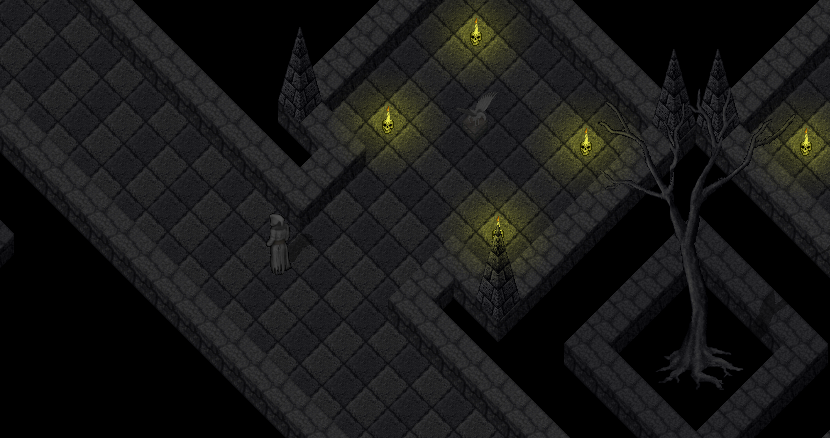
After confirming your selection, your character will materialize on Endor. However, it begins as a soul that has yet to choose its earthly form. There are of five races to choose from. The chosen race affects the character's stats as well as its appearance. It is advisable to decide in advance what class you want to pursue, and choose your race accordingly.
By clicking on the statuette of the given race, you can read something about it, its strengths, weaknesses and recommended professions.
Click “Apply” to select a race. Race can be freely changed until you leave the starting room. But if you go through the portal at the end, the choice becomes permanent, so choose carefully! It is clear that some races have a natural aptitude for becoming, for example, a knight or a wizard. But nothing is impossible in Endor, each character has a free choice and can definitely fall a little further like an apple from a tree.
First steps
Once you appear in the world of Endor, you will be greeted by Guide Quark.
Quark
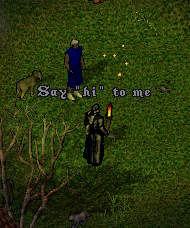
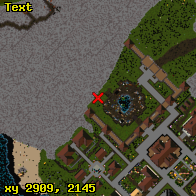
If you say hi to him (as he prompts you to), a dialogue will open where he will explain the basic elements of gameplay and guide you through the first steps of Endor. - If you want to change the language of the game to Czech, write the command .switchlang .
Read carefully what the Guide tells you and you shouldn't get lost. Still, here are some tips to get you started.
- Put the dagger in your backpack into your hand. Open the backpack by double-clicking on its image in the character menu (so-called paperdoll). Daggers can then be placed in your hand either by double-clicking on it, or by clicking and dragging on the paperdoll character graphics.
- In order to attack, you must turn on “War mode”. It can be turned on by default with the tab or by clicking on the inscription "Peace" on the paperdoll
- it will change to the orange colored "War".
Be careful what you attack! After turning on war mode, you double-click to attack an NPC, but attacking a blue NPC or a blue player in the city turns you into a criminal, and then anyone can kill you with impunity, or send guards to finish you off. Therefore, always attack only gray or red monsters and NPCs. Quark immediately sends you to Kenen, who is standing nearby.
Kenen
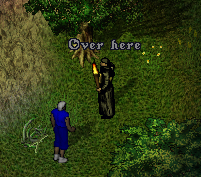
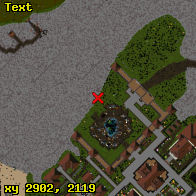
He will give you the task of bringing him 150 feathers from birds. This is obtained by killing any birds throughout Daugas, using the .rip command on their corpse, and dragging the feathers onto your character or into your backpack.
All the quests you have received can be displayed with the .questlog command.
Return to Kenen when you have 150 feathers. He will then send you to William at the main bank.
William
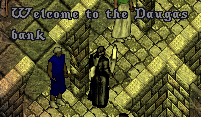
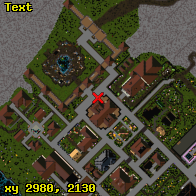
William will explain the functions of the bank. The banker will open your chest at the command bank - ask him using the word help for more options. For example, you can find out how much money you currently have in the bank with the command status .
Then he will send you to Jake, who is based in the Daugask church:
Jake
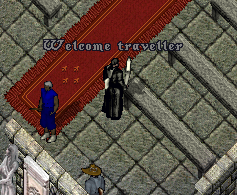
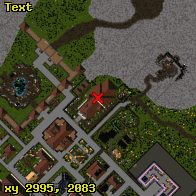
Jake walks you through death and reanimation on Endor. If your character dies, all items (with a few exceptions such as keys or runebooks) will remain in the body, and the player must go to the Healer to revive the ghost. You can find the closest one with .findhealer command. When you come to him, so that he can revive you, he must see you - you must have "War mode" on. It's usually enough, if it doesn't work the first time, try telling him something. Healers are important for other reasons as well, for example if your character catches a plague or poison that he can't cure himself, just get close to any healer and he will rid you of the disease.
Another important piece of information she will advise you on is how to reach other levels. Levels on Endor do not jump automatically, but after reaching a sufficient amount of experience (exp) you have to buy a new level from your classmaster. Masters of each profession are discussed in the respective wiki articles. To advance to the next level, if you have enough money in your main backpack, tell the master the command level .
So Jake sends you to the master of the wanderer profession, which you are after character creation. It is located in the beginner's camp in Daugas, near Quark.
Cameleo
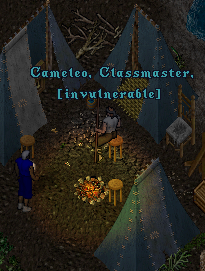
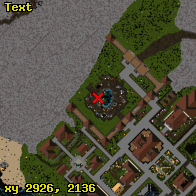
Write the level command to him to advance to the next level. The first one is free :-) After that, return to William at the Daugas Bank. After completing this part of the tutorial, your next task is to reach level 3. Run around the city killing animals, doing npc quests, and don't forget to return to Kenen at level 3 (if you forget, you'll have a reminder in the .questlog menu.
Kenen will then send you to Glimp to learn more about professions. To find Your classmaster talk to Clarenc. He will explain how travling on Endor works, Lars, Silver and Lysander. He will also give You recall runes and mark of wand and wand of recall.
Glimp
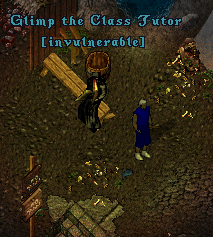
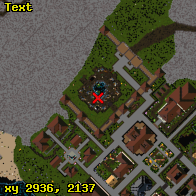
To choose a profession in a given guild, find a master and tell him the join command. The master will tell you the oath, which you must repeat exactly (including punctuation!). If you didn't have time to copy the text, you can find it in the Journal, which you open with the button on the top bar.
You will have to make your own way back, or take a ride with someone. There are several types of transporters on Endor that will transport you to a large number of locations around the world for a small fee. They are "Lars"' who drives on the main land, ''Silver' who transports across the seas and "Lysander" who controls the airship that transports you almost anywhere. In each guild there is a possibility to ride back to Daugas with at least one of them.
The next step is to acquire the basic equipment for the profession you have chosen. Most of the low level quests in Daugas reward not only money but also a new beginner's currency - "Rusty coins". You can use this currency in the starting camp to buy basic equipment for each character, including reagents, bandages, ammunition and potions. The sources of rusty coins are varied, apart from the already mentioned quests, you can find them in treasures in low level dungeons, you can get them by selling various things from npc in the starting camp (feathers, meat, etc.), and they even appear in a bag that can drop after discharging any surface spawn (Bag of Spoils).
After choosing a profession, we recommend talking to Gaian, the Advanced Tutor:
Gaian
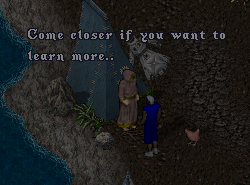
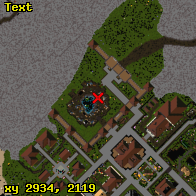
Gaian guides you through the trading system for Rusty Coins. You will receive a small amount from him, with which you can buy bandages, cure potions and a short sword from the relevant NPCs. If you bring these items to him, he will reward you with a large amount of Rusty Coins. We recommend not to skip this step, with these coins you can easily buy any equipment you lose!
This completes the tutorial and you can go on an adventure!
More useful hints
- Vendors respond to the words
buyandsell, the banker will open your chest atbankcommand - ask him with the wordhelpfor more options. Quest vendors usually respond to a greeting (hi). - If you need to earn money, collect everything salable and useful from monsters. You can sell reagents to other players if you don't need them. Feathers, hides or meat (after gutting -
.rip) can be obtained from some monsters, which can also be cashed. On the contrary, weapons and armor that have the epithet (shabby) will not be of much benefit to you. Weapons are blunt, armor provides minimal protection and destroy after a few hits. - Watch out for any highlighted system messages when equipping a weapon or armor. Mostly this means you'll have trouble using these items.
- Poison can be cured either by healing with Bandages with Healing or Veterinary skill (for druids in morph only) above 50%, or more often with a bottle of cure. A weaker cure potion only cures a weaker poison. Greater cure can completely cure all poisons except natural poison, which can be obtained from poisoned walls. Drinking the cure protects against further poisoning for a while - the stronger the drink, the longer the protection.
- You can get out of paralysis with the help of hypnotic ornament (made by craft using engineering). There are several types. The more intelligence the character has, the stronger the ornament is needed. The ornament can be applied using the
.hypnotic. - If you go somewhere in a group, use the party system (double click on the right coiled scroll on the character's paperdoll). Everyone in the party will then gain experience.
- A mounted animal can only be ridden if it has a briddle on. This is bought from the vendor and is fitted to the animal by a player who has knowledge of Animal Taming.
- You can stable the animal for a fee. Just tell the vendor (stable master)
stable, pay and you will receive a confirmation (ticket) that the animal is stabled with him. If the stabled animal has a briddle, the ticket is white, otherwise it is beige. You can collect the animal back by dragging the ticket to any stable master. Don't forget to feed your animals regularly or they will leave you! - If you find a small yellowish pouch inside the monster's body with the description “a treasure of [name]”, do not try to open it. It is a small treasure, which usually contains some magical item. These treasures are often equipped with some sort of trap that can even kill an unwary hero. A Member of the Thieves Guild can safely open the treasure.
- By killing another player other than in self-defense or without the criminal flag, you get one kill recorded. You become a murderer (= PK, player killer, not recommended for beginners) after reaching 3 kills.
- Do not attack other players who do not have criminal flag unless necessary. You will become the aggressor and the attacked can kill you or call the city guards on you.
- Be careful of your belongings, they can be easily lost. Do not take unnecessary valuables with you on expeditions and hide them in the bank. There is a bank in every city, open your bank chest by using the word bank. Do not be away from keyboard in town while wearing expensive gear; if your character is attacked, no one can defend it but you.
- In your little house, you might encounter a thief who sneaked in through an open door. You can reveal them using the command
.housing revealand possibly kick them out with.housing eject. You can also use the eject command to throw yourself out of the house, ensuring you don’t leave the door unnecessarily open when you leave. If you give someone a key to your house and later decide you don’t want them to have access anymore, you can change the key on the house control panel. It’s also a good idea to change the key after purchasing the house itself.
